Micro Center Stores [
store locator] offer
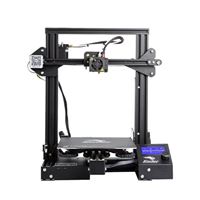
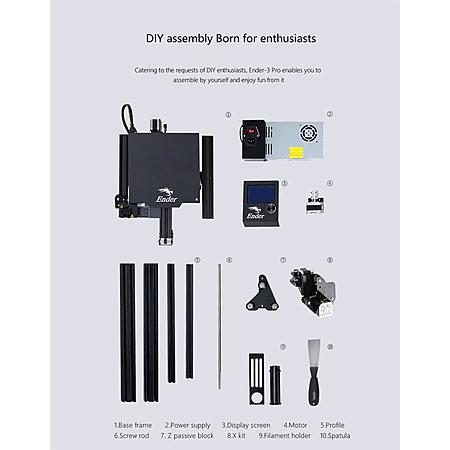
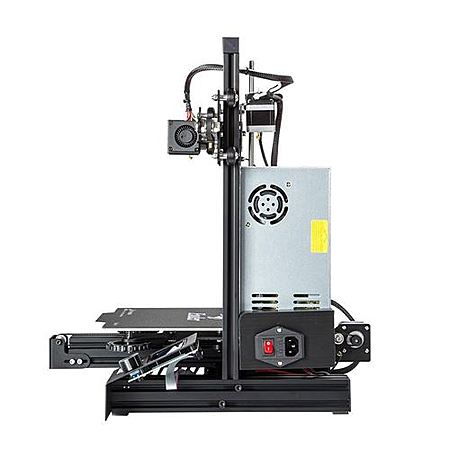
New Customers: Creality Ender 3 Pro 3D Printer for
$99.99 when you follow the steps below and present unique text coupon barcode at pickup. Offer valid in-store only.
- Note: Offer valid through 10/18/2021 or while supplies last
Thanks to community member
dealboy12 for finding this deal.
Available:
Deal Instructions:
- Visit the Sign-up Page here and fill out your info
- Click on the Send My Coupon button
- Wait for the page to load, this can take some time
- Note: If it errors-out, reload the page and try again
- Once completed you will get a 'Thank you, your coupon code has been sent.' message on the page
- Check your Text Messages and reply Y to the text that was sent
- You should receive a link to your Coupon shortly after
- Coupon is valid through October 18, 2021


Leave a Comment
Top Comments
Make sure to print stuff like the filament wheel (that helps the filament feed), required a ball bearing. Also the tool holder is nice, as well as pi camera holder which you can integrate into octoprint so you can see your prints while they print without physically looking at the printer. If you are not technically inclined, go with another printer that works out of box. Some printers come fully assembled and already calibrated. If you don't have a programming background, 3d printing will be hard unless you are just printing something someone else has already created. Often things people have designed need to be modified to meet your needs.
TLDR: Good 3dprinter, bad firmware, takes time and effort, this printer is basically taking on a whole hobby just to get it working properly. If you want plug and play, this is not the printer for you.
Slicing software: Cura.
If you want to learn the basics, skim the below info.
First, I recommend watching some 3d printing basics from youtubers like Teaching tech [youtube.com], Thomas Sandlederer [youtube.com], Uncle Jessy [youtube.com], maker's muse, 3d printing nerd, cnckitchen, and many others.
Now you need 3 things to 3D print something:
3d model
3d printer
slicing software
The a software translates ("slices") the models into a code the printer can read (gcode). The consumer level printing industry is pretty open source.
That means three things: you can use almost any software with any printer, there's plenty of community support, open source can sometimes lack polish and ease of use (think iphone vs windows phone interface).
How it works:
Filament goes through an extruder
Extruder has a gear and a tension wheel
Filament gets pushed into hot end through a "bowden" tube.
Hotend heats up filament
Hotend fan keeps the filament from melting and clogging outside of the nozzle
Filament comes out the nozzle and is cooled by the cooling fan
Now on to the actual packages.
Popular slicers - Cura, Prusaslicer
Popular 3d print file website - Thingiverse (free), myminifactory, cults3d, pinshape (some free)
Popular beginner CAD - TinkerCAD (free)
Popular Novice CAD - Fusion360 (free, just have to look for right version)
Popular mesh modifier - Meshmixer (free) - cut/slice/split/add keys for printing, remesh
Popular mesh modeling - Blender (free, open source, steeeeeeep learning curve)
Popular mesh digital skulpting - Free: Meshmixer, Skulptris PAID: Mudbox,Zbrush
Popular resources - reddit: r/3dprinting, r/fixmyprint, r/functionalprint, r/3dprintingdeals Others https://all3dp.com/
If you want to create your own engineering based designs, use a CAD. If you want to create your own organic style designs, use mesh modeler or sculpting software.
Additional Tools needed:
Calipers
isopropyl alcohol - cleaning bed
Utility knife (be carefull)
Hex keys (included)
10mm wrench (included)
Flexible scraper (included)
Additional Tools recommended:
Straight edge
Square (woodworking square)
razor blade
deburring tool (highly recommend)
sand paper
tack cloth (to remove dust)
Clearcoat - I use Rustoleum 2X high gloss - smells better and dries fast.
Tape, hairspray, glue - for bed adhesion issues, if properly leveled it isn't needed. I use aquanet hairspray on glass beds.
What to expect before first print:
Check all bolts, nuts, check belt tension, and squareness of frame.
Check tightness of rollers on eccentric screws (not to tight, able to spin by hand with some friction)
Clean the bed
familiarize with menus on printer screen
home printer
Level the bed
Print model on usb stick.
What to do during your first print:
Keep the printer near you for first few prints at least.
Check hotend temp is ok (190-210 for PLA)
Check bed temp is ok (35-60 for PLA)
Watch the first layer, adjust bed height or level if needed. (not to close, not to far)
Watch other layers, are they printing ok?
Watch components, is the extruder spinning without mechanical noises? is filament coming out as it should (not underextruding)?
What to do after first print:
Download calibration models (thingiverse)
Choose your basic settings in the slicer (stick to defaults)
Slice and print your first model
If you'd like to print more complicated models with supports and better quality then go ahead and run through:
Follow through with the calibration prints - use youtube or teachingtech as your guide [github.io]
learn how to change a nozzle, learn how to reassemble the hotend properly (very very important)
Flow calibration
Stringing calibration
do not do linear advance, Ender3s don't support it.
This is a quick and dirty list of things. I encourage anyone to do their own due diligence, youtube has a lot of great clear and easy to follow guides.
423 Comments
Sign up for a Slickdeals account to remove this ad.
Our community has rated this post as helpful. If you agree, why not thank mcmep11
Sign up for a Slickdeals account to remove this ad.
Our community has rated this post as helpful. If you agree, why not thank JesseR6576
Our community has rated this post as helpful. If you agree, why not thank Poolshark314
Our community has rated this post as helpful. If you agree, why not thank Minions
Make sure to print stuff like the filament wheel (that helps the filament feed), required a ball bearing. Also the tool holder is nice, as well as pi camera holder which you can integrate into octoprint so you can see your prints while they print without physically looking at the printer. If you are not technically inclined, go with another printer that works out of box. Some printers come fully assembled and already calibrated. If you don't have a programming background, 3d printing will be hard unless you are just printing something someone else has already created. Often things people have designed need to be modified to meet your needs.
TLDR: Good 3dprinter, bad firmware, takes time and effort, this printer is basically taking on a whole hobby just to get it working properly. If you want plug and play, this is not the printer for you.
They sell a ton of these. When boxed up, its not a large item.
This printer is amazing at this price point. Nearly all 3D printers need tinkering, even the more expensive ones. May as well start with a machine like this to see how you like the hobby. I must warn you all, it is addicting.
Sign up for a Slickdeals account to remove this ad.
Our community has rated this post as helpful. If you agree, why not thank DealArtist
Make sure to print stuff like the filament wheel (that helps the filament feed), required a ball bearing. Also the tool holder is nice, as well as pi camera holder which you can integrate into octoprint so you can see your prints while they print without physically looking at the printer. If you are not technically inclined, go with another printer that works out of box. Some printers come fully assembled and already calibrated. If you don't have a programming background, 3d printing will be hard unless you are just printing something someone else has already created. Often things people have designed need to be modified to meet your needs.
TLDR: Good 3dprinter, bad firmware, takes time and effort, this printer is basically taking on a whole hobby just to get it working properly. If you want plug and play, this is not the printer for you.
Leave a Comment