expiredpanini posted Apr 01, 2024 06:58 PM
Item 1 of 3
Item 1 of 3
expiredpanini posted Apr 01, 2024 06:58 PM
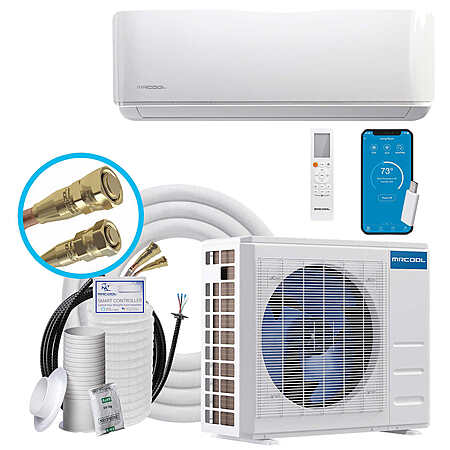
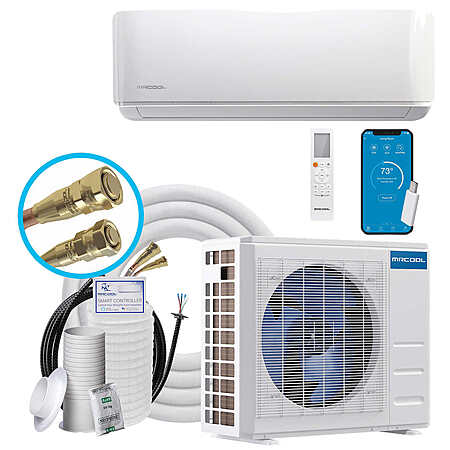
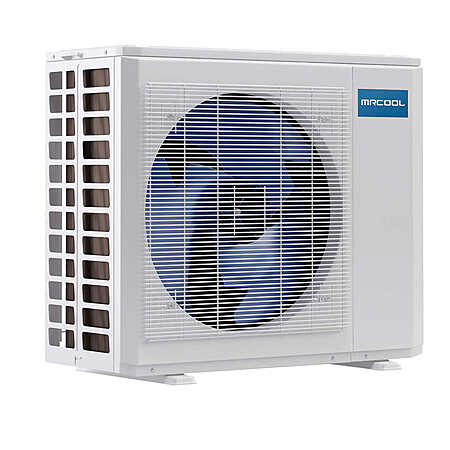
Costco Members: MrCool E Star DIY 12K BTU Ductless Mini-Split Heat Pump System
& More + Free S/H$1,250
$1,400
10% offCostco Wholesale
Visit RetailerGood Deal
Bad Deal
Save
Share


Leave a Comment
Top Comments
I nearly bought the DIY unit so I wouldn't have to mess with a vacuum, but now I'm glad I went that route to save money and learn along the way. You got this!
The install for this can be very involved but it will really depend on your situation layout and skill level. If you get a 120v/15' hose unit that you can plug in to a standard recepticle, mount the head on the wall, drill a hole and shove the lines outside, then mount the unit on the siding or a concrete pad outside the wall, this install will likely be pretty easy.
It also be a pain as well though once you get into the 240v units if you aren't set up for it. I'm an electrician by trade and it took me 50 hours to install mine. That involved quite a few steps:
-Coring a 3" hole through brick, running lines up and through my garage and out the side wall.
-Setting up a chain-fall to hoist the condenser into the air, plus buying wall brackets and placing backing board in the walls with lag bolts to make damn sure it was solid.
-I bought the line gutter kit to give it a really clean install, highly recommend it.
-Run 1/2" conduit from my panel to a junction box outside the house, through the garage, to a disconnect under the unit.
-Installed 30 amp breaker and pulled 2 circuits a neutral and a ground, 10awg. The condenser doesn't need the neutral but you need a service gfci recepticle within a reasonable distance of the condenser unit. Plus it's been great having a plug out there now.
Sorry for the long ass post but take a few minutes with a pen and paper and a measuring tape before starting a project like this. What length of lines are you getting, how are you going to hide them? (coiling them up neatly behind the condenser is fine) What kind of walls are you drilling through, where is the condenser mounting, what voltage system will you need?
A 3" masonry core bit, wall brackets, gutters, EMT conduit, disconnect, hose and conduit supports, wire, chainfall; that's all things I hadn't anticipated but were made possible by my sponsors Amazon next day shipping and repeated trips to Home Depot heh.
Wish I knew how to host pics because it turned out great though. Good luck and safe installs everyone 👍
119 Comments
Sign up for a Slickdeals account to remove this ad.
The install for this can be very involved but it will really depend on your situation layout and skill level. If you get a 120v/15' hose unit that you can plug in to a standard recepticle, mount the head on the wall, drill a hole and shove the lines outside, then mount the unit on the siding or a concrete pad outside the wall, this install will likely be pretty easy.
It also be a pain as well though once you get into the 240v units if you aren't set up for it. I'm an electrician by trade and it took me 50 hours to install mine. That involved quite a few steps:
-Coring a 3" hole through brick, running lines up and through my garage and out the side wall.
-Setting up a chain-fall to hoist the condenser into the air, plus buying wall brackets and placing backing board in the walls with lag bolts to make damn sure it was solid.
-I bought the line gutter kit to give it a really clean install, highly recommend it.
-Run 1/2" conduit from my panel to a junction box outside the house, through the garage, to a disconnect under the unit.
-Installed 30 amp breaker and pulled 2 circuits a neutral and a ground, 10awg. The condenser doesn't need the neutral but you need a service gfci recepticle within a reasonable distance of the condenser unit. Plus it's been great having a plug out there now.
Sorry for the long ass post but take a few minutes with a pen and paper and a measuring tape before starting a project like this. What length of lines are you getting, how are you going to hide them? (coiling them up neatly behind the condenser is fine) What kind of walls are you drilling through, where is the condenser mounting, what voltage system will you need?
A 3" masonry core bit, wall brackets, gutters, EMT conduit, disconnect, hose and conduit supports, wire, chainfall; that's all things I hadn't anticipated but were made possible by my sponsors Amazon next day shipping and repeated trips to Home Depot heh.
Wish I knew how to host pics because it turned out great though. Good luck and safe installs everyone 👍
I have the 24k unit cooling my lower floor and my only regret was not having done it before.
I have the 24k unit cooling my lower floor and my only regret was not having done it before.
Edit: This works for me because my furnace return air vent is outside my living room where the mini split is, so cool air enters there and is distributed through the house.
Lay the excess coil horizontal on the ground. Don't leave it vertical as it can cause refrigeration and oil pooling and hard on compressor over time.
Try best to get a non fused disconnect. If for some reason you can only get a fused disconnect - DO NOT fuse the neutral. Pigtail the neutral (likely out of code for your local) or get a dummy fuse. A real dummy fuse and not a chunk of copper lol.
I'm pretty sure a lot of these small mini splits are all generics that get rebranded.
In my case, I live in North Texas, which only have minimal winter, but very low gas price. Gas is still considered to be a bit more cost effective here.
What I was getting at:
https://www.maine.gov/energy/site...ulator.x
That XLS allows you to enter your actual cost of various forms of heating and efficiencies and it will tell you which is cheapest to operate. Again the problem with heat pumps is that their efficiency varies with temperature, so you really need to have a good idea of how the COP varies with temperature to make an educated decision.
Sign up for a Slickdeals account to remove this ad.
Anyway, the mrcool stuff is basically the opposite of "pro" installs because the charge is stored in the line sets. To use only mrcool condenser and air handlers, you'd need to evacuate the charge from your mitsubishi, then replace all the mitsubishi eqpt with mrcool, then recharge the system. Kind of a major job for diy.
Last, if you have mitsubishi it was almost certainly installed by a licensed pro and has a ton of warranty service left on it, since you get no warranty from mitsubishi unless you're one of their certified installers, so nobody in their right mind would self-install their equipment. It's a big step to dump their equipment after you've paid for their warranty. Maybe there's something else about your setup that could be improved rather than junking the whole system?
Our community has rated this post as helpful. If you agree, why not thank hydrocynus
The install for this can be very involved but it will really depend on your situation layout and skill level. If you get a 120v/15' hose unit that you can plug in to a standard recepticle, mount the head on the wall, drill a hole and shove the lines outside, then mount the unit on the siding or a concrete pad outside the wall, this install will likely be pretty easy.
It also be a pain as well though once you get into the 240v units if you aren't set up for it. I'm an electrician by trade and it took me 50 hours to install mine. That involved quite a few steps:
-Coring a 3" hole through brick, running lines up and through my garage and out the side wall.
-Setting up a chain-fall to hoist the condenser into the air, plus buying wall brackets and placing backing board in the walls with lag bolts to make damn sure it was solid.
-I bought the line gutter kit to give it a really clean install, highly recommend it.
-Run 1/2" conduit from my panel to a junction box outside the house, through the garage, to a disconnect under the unit.
-Installed 30 amp breaker and pulled 2 circuits a neutral and a ground, 10awg. The condenser doesn't need the neutral but you need a service gfci recepticle within a reasonable distance of the condenser unit. Plus it's been great having a plug out there now.
Sorry for the long ass post but take a few minutes with a pen and paper and a measuring tape before starting a project like this. What length of lines are you getting, how are you going to hide them? (coiling them up neatly behind the condenser is fine) What kind of walls are you drilling through, where is the condenser mounting, what voltage system will you need?
A 3" masonry core bit, wall brackets, gutters, EMT conduit, disconnect, hose and conduit supports, wire, chainfall; that's all things I hadn't anticipated but were made possible by my sponsors Amazon next day shipping and repeated trips to Home Depot heh.
Wish I knew how to host pics because it turned out great though. Good luck and safe installs everyone 👍
Got pioneer 12K with 23 seer for $860. Trying to understand whether it is worth spending another $500 for Mr. cool or should I just stick to pioneer. Thanks
Edit: First image host looked awful, I'm trying a different one. I hope it is better quality.
https://ibb.co/k3RfXMY
https://ibb.co/xY1Crmc
https://ibb.co/grX2HSP
https://ibb.co/VTWf16y
https://ibb.co/309jWtv
https://ibb.co/cN943Ps
https://ibb.co/gDGBypR
https://ibb.co/gyQt9gn
https://ibb.co/d6nt1Vh
https://ibb.co/gPW8Fk9
https://ibb.co/kKMs6YC
https://ibb.co/5WGC0gY
https://ibb.co/J31TNqR
https://ibb.co/yNcqVSj
https://ibb.co/RNnN5Mj
https://ibb.co/Gt9nBvC
https://ibb.co/x3KCpFy
https://ibb.co/2k8Lqr2
https://ibb.co/djzQQtJ
https://ibb.co/82HV0DP
For those wondering why I ran parallel conduits out of the junction box, I ran an extra two circuits for a future EV charger or welder in the lower pipe. I don't like doing things twice, and future-proofing is sometimes a good move.
Sign up for a Slickdeals account to remove this ad.
I installed a Mitsubishi unit maybe 8 years ago, before they became super popular. What I thought was the hardest part was getting the wall penetration hole drilled at an angle. So it would drain properly and the copper wouldn't kink when bending it downward. A buddy doing his own install kinked both lines and decided to call a pro rather than try again with a new lineset.
Either this DIY or a regular unit isn't terribly difficult to install for anyone somewhay handy. I've done 3 now (none of them DIY since I've got a vac pump) without issues at install. My 8 year old Mitsu developed a small leak at the high pressure (small line) connection last year. Fairly common I guess (should've used nylog). Tightened the connection, added r410, and it's been good since.
One thing not mentioned so far. This things need regular cleaning. To do it right you need to mostly disassemble the indoor unit. The squirrelcage blower fan is pretty difficult to clean in place, but a piece of cake once removed. They make hoops you can put around the unit to catch the waterflow when cleaning. First time I did mine I just dragged the garden hose in. Got a little smarter and have used a garden sprayer since. Much less of a mess.
Leave a Comment