expireddavid3808 posted May 22, 2021 08:19 PM
Item 1 of 5
Item 1 of 5
expireddavid3808 posted May 22, 2021 08:19 PM
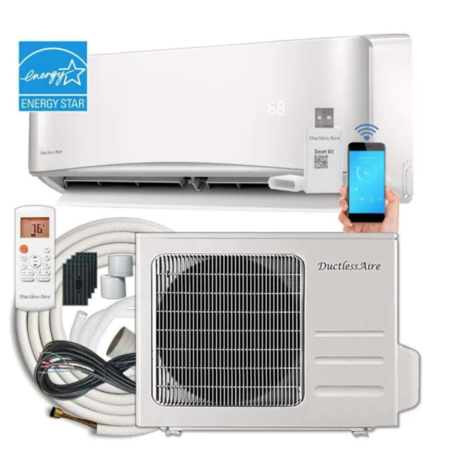
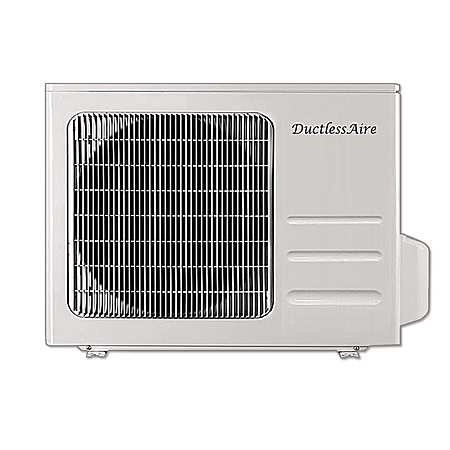
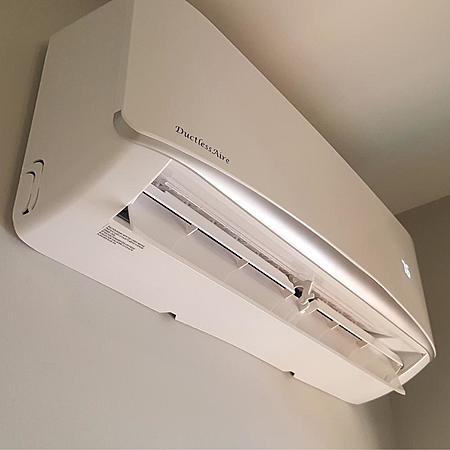
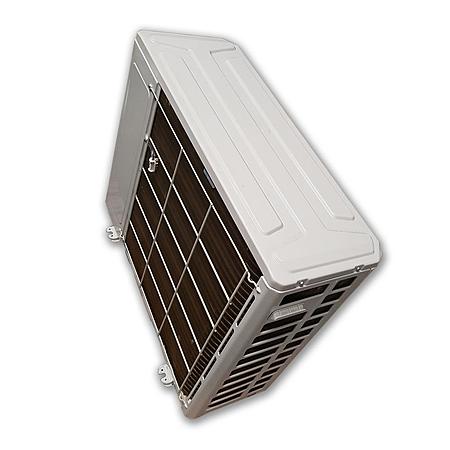
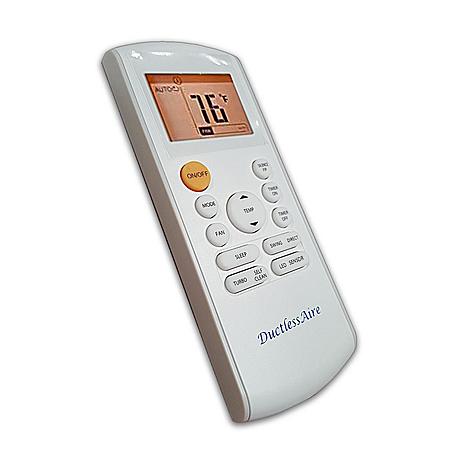
DuctlessAire 12 Seer 12000 BTU 220V 1-Ton Ductless Mini Split Air Conditioner
+ Free Shipping$779
Home Depot
Visit Home DepotGood Deal
Bad Deal
Save
Share

Leave a Comment
Top Comments
This works if you're handy since you'll probably do a better job. Doing things like a nitrogen pressure test, which aren't stated in the manual, is a good practice that many installers will skip unless it's explicitly stated in the manual like in some Mitsubishi units. This practice makes sense for heat pump R410A units which will see upwards of 450 psi on the head when in heat pump mode. But expect to spend $500-$700 on tools if you want to do it right.
Edit: if you want me to comment more on the tools I went with, let me know.
Edit Edit: As promised, I posted my tools breakdown reply on #99 of this thread, but I'm also going to post it below too. If this angers the mods then please remove post #99.
Everyone can decide what you need for your install versus others, but here's the tools that I bought for mine:
Nitrogen Tank w/ Regulator (got on Craigslist)1 $ 100.00
Appion CTEE14 MegaSeal Low-Loss Charging T-Fitting - 1/4'1 $ 49.94
Appion MGAVCR Mega Flow Vacuum Rated Valve Core Removal Tool – 5/16" System Connection1 $ 48.48
CPS VG200: Vacuum Micron Gauge with Digital LCD Display1 $ 146.21
Refrigeration Technologies RT201B Nylog Gasket/Thread Sealant1 $ 10.25
Yellow Jacket 42004 Series 41 Manifold with 3-1/8" Gauge, psi, R-22/404A/410A1 $ 112.29
Yellow Jacket 19173 R-410 5/16" to 1/4" coupler w/ schrader valve.1 $ 14.26
CPS Pro-Set R410A Flare Gauge1 $ 19.81
CPS BLACKMAX BFT850 Ultra-Lightweight R-410A Clutch-Type Ecentric Flaring Tool1 $ 130.03
Reed Tool DEBO Pencil Shape Deburring Tool for Copper1$11.68
RIDGID 32975 Model 103 Close Quarters Tubing Cutter, 1/8-inch to 5/8-inch Tube Cutter , Silver , Small1$12.67
Johnsen's 6915 Vacuum Pump Oil - 12 oz.1 $ 9.79
PITTSBURGH AUTOMOTIVE 3 CFM Two Stage Vacuum Pump1 $ 149.99
PITTSBURGH 3/8 In. Metric Crowfoot Wrench Set, 7 Pc.1 $ 9.99
For mine, it was a total of $825-ish, with it being more like $900 after tax. But I bought multiple things that most people don't need to buy, marked in italics, so you can save a lot of money skipping these. These optional tools represent an additional $372.61 ($400.55 after tax, at least where I live) you can eliminate about 50% from the tools budget.
First and foremost, don't attempt to work with electrical or HVAC unless you're pretty comfortable with DIY projects.
The Nitrogen tank is optional for pressure testing. Some say if you can pull a good vacuum and let it sit for a while that is "good enough" and most company's instructions exclude this from the installation instructions. But it's worth considering because when running R-410A in heat pump mode, you'll get high pressure across your head side of the loop. This makes sense because the high-pressure side = heat. So in my head it made sense you'd want to do a pressurization test and a vacuum down test, since one is pushing apart the fittings (pressure) and the other is sucking them together (vacuum). Since the fittings will all be exposed to both types of pressures it makes sense for me. Follow Dakine or Mitsubishi installation manual instructions for nitrogen pressure testing if you opt to do it. Note that most professional installers WILL SKIP THIS unless it's a unit that requires it (think Mitsubishi) and the installer is one of their "diamond" approved installers or whatever.
Secondly, I bought a flaring tool because I had a 2-head system and cut the tubing to fit the installation and make it more tidy. This is optional and I do not recommend it unless you know what you're doing. It also saves money to skip this. Before cutting, you need to make sure your run or runs have the required length to prevent overcharging the system. If you have a single head unit and end up cutting the tubes to 1/2 the length you may have too much refrigerant in the linesets. Refer to your manual or talk to the company before you decide to do this. And if you decide to do it anyways, yes it must be a HVAC specific flaring tool. Get one with the clutch system to prevent overtightening the flare press and make it foolproof. R-410A runs at too high of pressures to get away with subpar flares. Deciding to just accept the standard length of the copper tubing eliminates the costs associated with the Flaring tool, flaring gauge, deburring tool, and pipe cutting tool.
As for the rest, you do not NEED a digital micron gauge, many just use their normal gauge set's low pressure side gage and watch to see if the needle moves. This will also work. Again I wanted to go with professional duty equipment to get an install I'm 100% confident in. That way if the thing dies in a few years I won't have wonder in the back of my mind whether I screwed up the install. I know 100% my install was perfect. I went with the Yellow Jacket brand gauges, although you could in theory just get the low side gauge, hose, and valve if you're just pulling vacuum and save some money. I'm sure the garden variety chinesium brand gauges are probably perfectly fine for a solo install and will cut the cost in half for them.
The Appion Schrader core removal tool and the t-valve are totally optional too. You'd have to do some youtubing to see how they're used, but here's a great video which shows essentially the same setup I bought: https://www.youtube.com/watch?v=81EeY7S
But you can skip those tools and just use the Yellow Jacket 5/16" to 1/4" adapter and be just fine without them. Your pressure drawdown will just take a bit longer since you're going through the Schrader valve, and you'll loose a tiny bit of refrigerant before the schrader valve closes. Skipping these tools will save you $130-$140.
For the vacuum pump I went with a harbor freight 3CFM rated 2-stage vacuum pump. I believe it's rated for sub-30 microns of vacuum which is great, and a review on their site showed a guy pulling 13 microns if I recall correctly. To put this into perspective most manufacturers suggest pulling below 500 microns before charging the system. This is slightly overkill but it works for me.
Lastly I already have a torque wrench but you can get them dirt cheap from harbor freight, and I bought some crowfoot wrenches to use with my torque wrench to torque the bolts to the manufacturer's specifications. Will it really matter if you don't do it to spec? I don't know but I'm not finding out.
Then beyond all of this you'll have to run some 220-240v and have a disconnect box by your run. If you're not a confident DIY'er don't go for this, but if you are then just watch plenty of videos of installations, follow the instructions, and you'll be fine.
Pros-
No duct work is obvious.
On demand which can save heating/cooling bill.
More precise temperature control "zones".
Cons-
The zones play as double edge sword, when moving in or out the heated/air conditioned space takes some getting used to.
The indoor unit hangs on the wall compare to just a register, so the wall is more or less occupied.
Have to run additional electricity to both in door and outdoor units and the tubes from the indoor unit to the outdoor unit.
More filters to clean.
168 Comments
Sign up for a Slickdeals account to remove this ad.
https://www.costco.com/forestair-...55013.html [costco.com]
Was recently quoted for a Quad mini split install for $8k, I would need to buy the system and copper/electrical lines. They were going to mount the mini splits with the condensate/copper/electrical going through the attic. I decided not to do it since the guy was not licensed but he did multiple installs.
The warranty stipulates the unit must be installed by a licensed HVAC company. It also says defective components must be returned, and the owner is responsible for all shipping costs. It doesn't include labor at all, which is likely to be the majority of the cost of a repair done by a contractor. They know the shipping costs both ways and the time waiting for them to receive the defective part and ship the new one are enough to discourage most people from making a warranty claim.
I'm not a lawyer, but I don't think it's legal under the Magnuson-Moss Warranty Act to specify who can install the equipment. According to the FTC [ftc.gov], "...companies can't void a consumer's warranty or deny warranty coverage solely because the consumer uses a part made by someone else or gets someone not authorized by the company to perform service on the product."
But I think it's a good rule of thumb to expect minimal support on these China units, and even if you get the parts replaced under warranty then you're going to spend more to have a HVAC guy recover the refrigerant, braze in the replacement, and charge the system than it'd cost to buy a new unit. But still you can probably replace the condenser unit multiple times and end up having lower costs than a lot of name-brand installations done by pros.
Something like this [globalsources.com] would be a good deal if shipping is reasonable. Supposedly, you can buy one as a sample for $180. I'm curious how much shipping would actually be to my door.
I'm pretty skeptical to be honest. It seems way too good to be true. I bet shipping for a single unit would be several hundred dollars. But I'd like to be wrong.
It is was easy, as in like buying from Amazon, everyone would be doing it.
But, you could fill up a 40' HQ and have it delivered from China to say, Chicago for about $3500 before dock fees and insurance. Are you ready to go into the ductless split system business?
Sign up for a Slickdeals account to remove this ad.
If that isn't required by the EPA, then you're coming across as a salty HVAC tech who hates seeing people DIY this kind of thing. Bad news is that this is a deals forum so people here aren't in the market to pay $2k in labor for a few hours of work.
This works if you're handy since you'll probably do a better job. Doing things like a nitrogen pressure test, which aren't stated in the manual, is a good practice that many installers will skip unless it's explicitly stated in the manual like in some Mitsubishi units. This practice makes sense for heat pump R410A units which will see upwards of 450 psi on the head when in heat pump mode. But expect to spend $500-$700 on tools if you want to do it right.
Edit: if you want me to comment more on the tools I went with, let me know.
Edit Edit: As promised, I posted my tools breakdown reply on #99 of this thread, but I'm also going to post it below too. If this angers the mods then please remove post #99.
Everyone can decide what you need for your install versus others, but here's the tools that I bought for mine:
Nitrogen Tank w/ Regulator (got on Craigslist)1 $ 100.00
Appion CTEE14 MegaSeal Low-Loss Charging T-Fitting - 1/4'1 $ 49.94
Appion MGAVCR Mega Flow Vacuum Rated Valve Core Removal Tool – 5/16" System Connection1 $ 48.48
CPS VG200: Vacuum Micron Gauge with Digital LCD Display1 $ 146.21
Refrigeration Technologies RT201B Nylog Gasket/Thread Sealant1 $ 10.25
Yellow Jacket 42004 Series 41 Manifold with 3-1/8" Gauge, psi, R-22/404A/410A1 $ 112.29
Yellow Jacket 19173 R-410 5/16" to 1/4" coupler w/ schrader valve.1 $ 14.26
CPS Pro-Set R410A Flare Gauge1 $ 19.81
CPS BLACKMAX BFT850 Ultra-Lightweight R-410A Clutch-Type Ecentric Flaring Tool1 $ 130.03
Reed Tool DEBO Pencil Shape Deburring Tool for Copper1$11.68
RIDGID 32975 Model 103 Close Quarters Tubing Cutter, 1/8-inch to 5/8-inch Tube Cutter , Silver , Small1$12.67
Johnsen's 6915 Vacuum Pump Oil - 12 oz.1 $ 9.79
PITTSBURGH AUTOMOTIVE 3 CFM Two Stage Vacuum Pump1 $ 149.99
PITTSBURGH 3/8 In. Metric Crowfoot Wrench Set, 7 Pc.1 $ 9.99
For mine, it was a total of $825-ish, with it being more like $900 after tax. But I bought multiple things that most people don't need to buy, marked in italics, so you can save a lot of money skipping these. These optional tools represent an additional $372.61 ($400.55 after tax, at least where I live) you can eliminate about 50% from the tools budget.
First and foremost, don't attempt to work with electrical or HVAC unless you're pretty comfortable with DIY projects.
The Nitrogen tank is optional for pressure testing. Some say if you can pull a good vacuum and let it sit for a while that is "good enough" and most company's instructions exclude this from the installation instructions. But it's worth considering because when running R-410A in heat pump mode, you'll get high pressure across your head side of the loop. This makes sense because the high-pressure side = heat. So in my head it made sense you'd want to do a pressurization test and a vacuum down test, since one is pushing apart the fittings (pressure) and the other is sucking them together (vacuum). Since the fittings will all be exposed to both types of pressures it makes sense for me. Follow Dakine or Mitsubishi installation manual instructions for nitrogen pressure testing if you opt to do it. Note that most professional installers WILL SKIP THIS unless it's a unit that requires it (think Mitsubishi) and the installer is one of their "diamond" approved installers or whatever.
Secondly, I bought a flaring tool because I had a 2-head system and cut the tubing to fit the installation and make it more tidy. This is optional and I do not recommend it unless you know what you're doing. It also saves money to skip this. Before cutting, you need to make sure your run or runs have the required length to prevent overcharging the system. If you have a single head unit and end up cutting the tubes to 1/2 the length you may have too much refrigerant in the linesets. Refer to your manual or talk to the company before you decide to do this. And if you decide to do it anyways, yes it must be a HVAC specific flaring tool. Get one with the clutch system to prevent overtightening the flare press and make it foolproof. R-410A runs at too high of pressures to get away with subpar flares. Deciding to just accept the standard length of the copper tubing eliminates the costs associated with the Flaring tool, flaring gauge, deburring tool, and pipe cutting tool.
As for the rest, you do not NEED a digital micron gauge, many just use their normal gauge set's low pressure side gage and watch to see if the needle moves. This will also work. Again I wanted to go with professional duty equipment to get an install I'm 100% confident in. That way if the thing dies in a few years I won't have wonder in the back of my mind whether I screwed up the install. I know 100% my install was perfect. I went with the Yellow Jacket brand gauges, although you could in theory just get the low side gauge, hose, and valve if you're just pulling vacuum and save some money. I'm sure the garden variety chinesium brand gauges are probably perfectly fine for a solo install and will cut the cost in half for them.
The Appion Schrader core removal tool and the t-valve are totally optional too. You'd have to do some youtubing to see how they're used, but here's a great video which shows essentially the same setup I bought: https://www.youtube.com/watch?v=81EeY7S
But you can skip those tools and just use the Yellow Jacket 5/16" to 1/4" adapter and be just fine without them. Your pressure drawdown will just take a bit longer since you're going through the Schrader valve, and you'll loose a tiny bit of refrigerant before the schrader valve closes. Skipping these tools will save you $130-$140.
For the vacuum pump I went with a harbor freight 3CFM rated 2-stage vacuum pump. I believe it's rated for sub-30 microns of vacuum which is great, and a review on their site showed a guy pulling 13 microns if I recall correctly. To put this into perspective most manufacturers suggest pulling below 500 microns before charging the system. This is slightly overkill but it works for me.
Lastly I already have a torque wrench but you can get them dirt cheap from harbor freight, and I bought some crowfoot wrenches to use with my torque wrench to torque the bolts to the manufacturer's specifications. Will it really matter if you don't do it to spec? I don't know but I'm not finding out.
Then beyond all of this you'll have to run some 220-240v and have a disconnect box by your run. If you're not a confident DIY'er don't go for this, but if you are then just watch plenty of videos of installations, follow the instructions, and you'll be fine.
You torque flare nuts the same way I do. One tip people might find useful is to torque the nut with the crowfoot wrench at a right angle to the torque wrench handle so you don't have to worry about any corrections. Case 3 here [scuba-clinic-tools.com] illustrates what I mean.
I agree with you that a micron gauge isn't absolutely necessary for a single DIY job like this. One thing people can do, though, to help ensure a good evacuation without a micron gauge is to do a triple evacuation [achrnews.com]. Triple evacuations aren't done much anymore with the availability of inexpensive digital micron gauges that indicate with certainty when a deep vacuum has been achieved, but that's how evacuation used to be done in pre-micron gauge times.
About flaring tools, I can't say enough good things about these generic $20 eccentric flaring tools [ebay.com]. Maybe the cheap ones are somehow not as good as the $100 ones, but the one I have works brilliantly. It even has the clutch you mentioned. It's definitely more than adequate for occasional DIY work. Inexpensive flaring drill bits [ebay.com] have also become available and are capable of producing good flares, although they do require a fairly powerful drill (corded or at least 18V if battery operated) that can run at 1,800 RPM. Flaring drill bits also get the tubing very hot, so protecting your hands with suitable gloves is a must. Copper debris can also be an issue with flaring drill bits, so you have to make sure it doesn't fall down into the tubing.
It is was easy, as in like buying from Amazon, everyone would be doing it.
But, you could fill up a 40' HQ and have it delivered from China to say, Chicago for about $3500 before dock fees and insurance. Are you ready to go into the ductless split system business?
And if you check, most of the US manufactures have entered the residential ductless units, while most have manufactured the commercial units used in hotels and motels. If you want a unit that holds up and don't mind it on the floor, those commercial hotel units last forever. I suppose you could mount it higher if you had a trim piece for the bottom, whereas I have seen hundreds of them in warehouses that were removed prior to demolition.
But I think it's a good rule of thumb to expect minimal support on these China units, and even if you get the parts replaced under warranty then you're going to spend more to have a HVAC guy recover the refrigerant, braze in the replacement, and charge the system than it'd cost to buy a new unit. But still you can probably replace the condenser unit multiple times and end up having lower costs than a lot of name-brand installations done by pros.
Absolutely on the manufacturer's support. The same thing goes for conventional split systems, too. You can buy two or three complete systems shipped to your door for the price a contractor charges for one installed. The warranties on systems installed by contractors are pretty disappointing too. I think most people would be shocked by how much warranty work costs after the contractor's typical one-year labor warranty expires.
You torque flare nuts the same way I do. One tip people might find useful is to torque the nut with the crowfoot wrench at a right angle to the torque wrench handle so you don't have to worry about any corrections. Case 3 here [scuba-clinic-tools.com] illustrates what I mean.
I agree with you that a micron gauge isn't absolutely necessary for a single DIY job like this. One thing people can do, though, to help ensure a good evacuation without a micron gauge is to do a triple evacuation [achrnews.com]. Triple evacuations aren't done much anymore with the availability of inexpensive digital micron gauges that indicate with certainty when a deep vacuum has been achieved, but that's how evacuation used to be done in pre-micron gauge times.
About flaring tools, I can't say enough good things about these generic $20 eccentric flaring tools [ebay.com]. Maybe the cheap ones are somehow not as good as the $100 ones, but the one I have works brilliantly. It even has the clutch you mentioned. It's definitely more than adequate for occasional DIY work. Inexpensive flaring drill bits [ebay.com] have also become available and are capable of producing good flares, although they do require a fairly powerful drill (corded or at least 18V if battery operated) that can run at 1,800 RPM. Flaring drill bits also get the tubing very hot, so protecting your hands with suitable gloves is a must. Copper debris can also be an issue with flaring drill bits, so you have to make sure it doesn't fall down into the tubing.
Sign up for a Slickdeals account to remove this ad.
Besides being quick, DHL (and others) also does the paperwork for you that can be a little intimidating the first time or two. In quantity, a forwarder and inspector are good choices to employ.... someone on the other end that ok's you are getting what you paid for before loading.
Or, we could just take a trip... you could spend a week in just one wholesale mall and not see it all. About 1.5 Billion people are competing for your dollar that do not want to go back to the stone age of growing rice.
Personally, I like Vietnam a little better.... just now growing, super cheap to visit and shop. A haircut, facial, manicure, pedicure, ears, etc. and about a 90 minute massage with two girls is like $15 or less that is all above the board....
Leave a Comment